Podcasting With Video in 2026: Tactics, Gear, & Software
Everything you need to know to make a video podcast that supports your audio, increases your discoverability, and gives your audience more.

Video podcasting doesn’t need to be complicated or expensive. It only becomes that way when advice is vague, and gear lists spiral out of control.
This guide is for people who have already decided to add video (should you make a video podcast?) and want to do it well, without guessing, overbuying, or rebuilding their setup from scratch.
Everything here is practical and field-tested, based on real recording spaces rather than studio showpieces. If you want video podcasting to feel clear, achievable, and worth the effort, you’re in the right place.
We use some affiliate links to products and services we recommend, so we may earn a small commission if you buy. Affiliate income helps support all our free content, though it never affects what you pay, and it never influences our opinions.
Alright, with that all said, let's kick off with a look at some common formats. Not all video podcasts are the same, so which kind would best suit you and your topic?
Types of Video Podcast
Video podcasts come in many styles, but most fall into three main types:
Remote Call (Talking Heads)
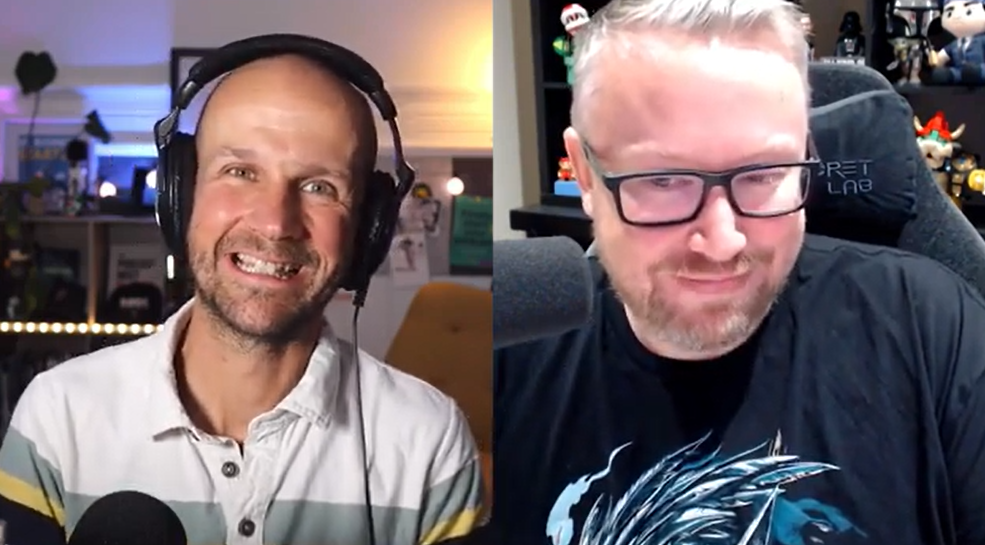
The most common video podcast format is the remote conversation. Guests or co-hosts join on camera, and the episode is released as a split screen or as alternating full-screen shots of whoever is speaking.
Pros: You get access to a global pool of potential guests and co-hosts without any travel logistics.
Cons: You're at the mercy of each participant's own setup. They might not have the best mic, camera, or lighting. And you'll have little or no options for multi-camera or varying-angle shots.
In-Studio (On the Sofa)
The "TV show" style setup involves bringing participants to a set location. This might be a podcast studio, a room you've converted in your house, garage, or the infamous basement. You can record with a single wide shot or use several cameras to cover different angles.
Pros: Complete control over the set and tech, allowing you to make a video podcast that looks and sounds professional.
Cons: Building a studio is expensive and requires space that most people don't have. Plus, unless you're paying travel expenses, you'll be limited to who you can persuade to travel there.
Solo (Just You)
Simply filming yourself talking is an age-old YouTube tactic, and some video podcasts follow this monologue-style format.
Pros: Complete control over your own setup, tech, and schedule.
Cons: Presenting solo is a skill that takes time to develop, so it can be tricky or intimidating for beginners. There's also an argument that a solo face-to-camera piece might not be as visually interesting or dynamic as the other formats.
The Golden Rule of Video Podcasts
No matter what type of video podcast you opt for, it must still work for people who never look at the screen.
Most podcast fans choose audio, whether they are driving, exercising, or getting through everyday chores. If your show stops making sense the moment someone looks away, the video is doing more harm than good.
The goal is not to replace the audio with visuals. It's to support it. Your video podcast should always pass the 'look away' test, and listeners should never feel like second-class audience citizens.
With that rule in mind, we can crack on and start building our video podcasting setup!
Choosing a Camera That Fits Your Style and Budget
When someone mentions video podcasting, the camera is one of the first things we think about. Obviously, it's an integral part of your setup, though it's only as good as your background, lighting, and audio. We'll look at optimising those shortly, but first up, how do you choose the right camera?
Here are your options.
Your Built-In Webcam
The quality of built-in cameras on laptops and smartphones has skyrocketed in recent years. If you're a complete beginner or an audio podcaster trying video for the first time, start here and find your feet with the process before upgrading.
Affordable Entry-Level Cameras ($70-$85)
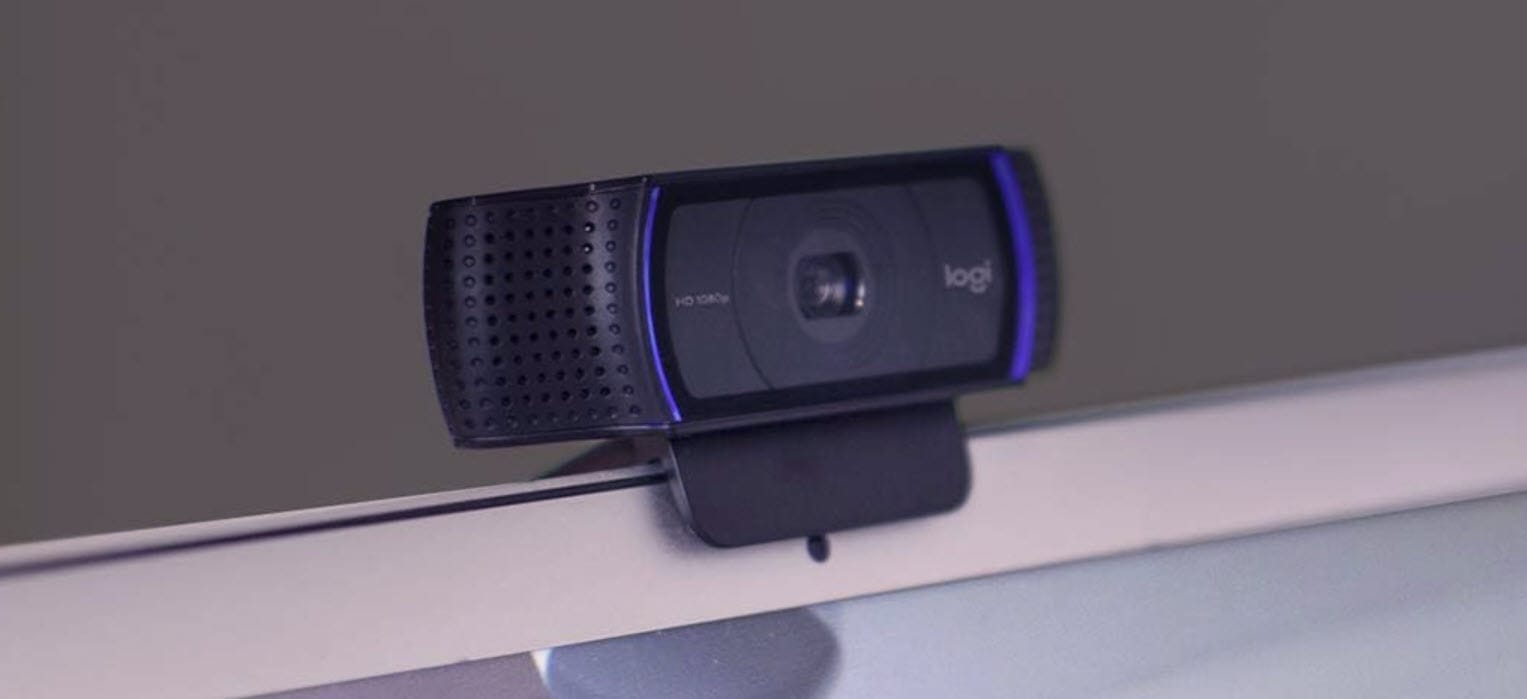
If you want to move beyond your built-in webcam without spending much, Logitech is a reliable place to start. Their entry-level cameras are easy to set up, consistently sharp, and a clear improvement on most default cameras. Models such as the C920 or the StreamCam deliver dependable autofocus, solid low-light performance, and colours that look good straight out of the box.
Mid & Upper Range Cameras ($125-$180)
Mid and upper-range webcams bring sharper detail, stronger dynamic range, and far more reliable performance in everyday home-studio conditions. Logitech’s Brio lineup is the obvious example here: higher resolution, more accurate colour, and cleaner images even when your lighting isn’t perfect. Colin uses the Insta360 Link webcam and finds the quality and colour on that a big upgrade, too.
These "pro webcams" are a smart choice if you’re publishing regularly and want your video to feel intentional and professional, without the added complexity of mirrorless cameras, lenses, or capture cards.
Logitech Brio 501 ($130)
Obsbot Tiny 2 Lite ($160)
Insta360 Link ($180)
Obsbot Tiny 3 ($350)
Recording with a DSLR or Mirrorless Camera
A DSLR or mirrorless camera can noticeably improve your video quality. Larger sensors handle low light better, produce more natural colour, and allow for a blurred background that looks deliberate. In a solo or fixed studio setup, this can make your podcast feel more polished.
The trade-offs are complexity and expense. These cameras usually need extra gear like a lens, capture card, and constant power. Setup takes more care, autofocus can be less forgiving, and changing framing or locations is slower. They work best when you can dial everything in and leave it there.
This option suits podcasters who want a locked-in studio look and are comfortable managing a more involved setup. But if you value speed or simplicity, or don't want to break your budget, then a good webcam is often the better choice.
Our Favourite Cameras
We've tested loads of different models over the past 12 months, and these 4k webcams stood out:
Nearstream VM20 ($250) - Chunkier build, but brilliant clarity with the remote control zoom and autofocus.
Obsbot Tiny 3 ($350) - great AI tracking feature to keep you front and centre.
Choosing a Microphone for Clean, Reliable Audio
It is easy to assume visuals matter most in a video podcast. But without good audio, even the best cameras, lighting, and backgrounds won't save your show.
Sound quality isn't entirely dependent on your mic, but it's a major driver. So which mic should you choose?
Popular Podcasting Mics
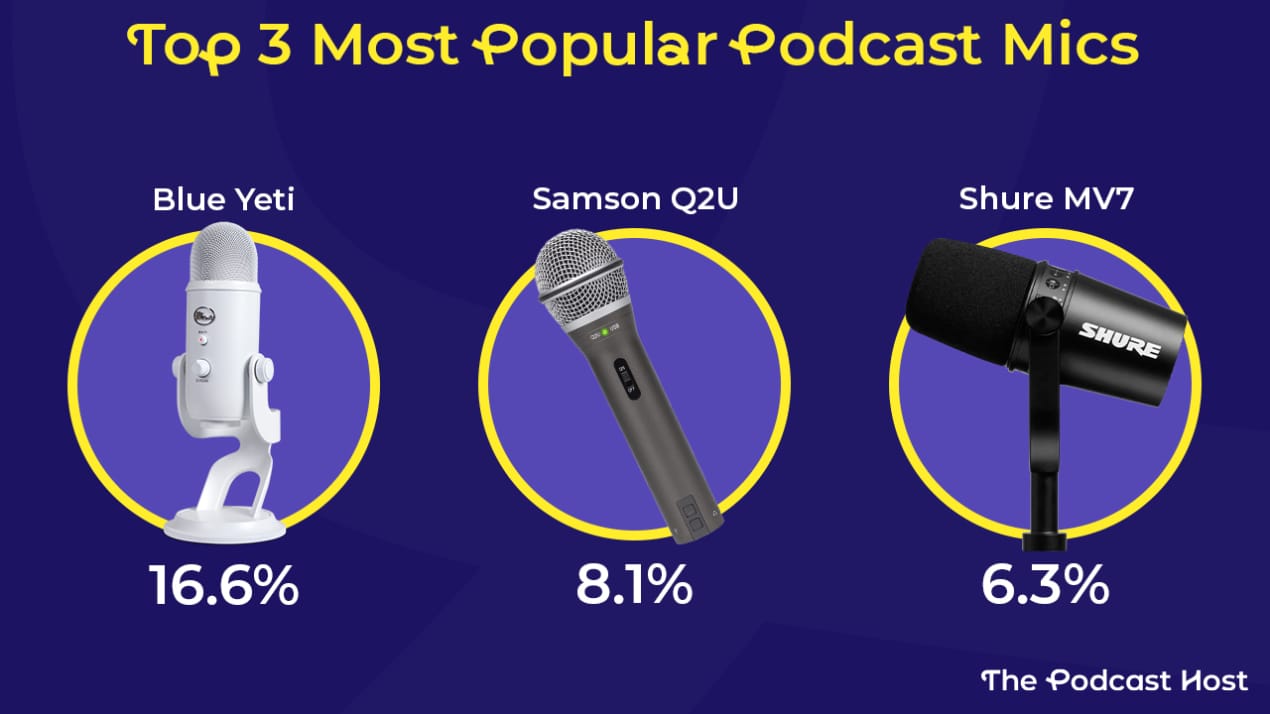
The Blue Yeti is the most popular mic in podcasting. On the plus side, it looks good on camera, but I've always thought it a little over-priced and over-hyped. Honestly, you'll get better quality for cheaper elsewhere.
One of those "better but cheaper" options is the Samson Q2U. Like the Yeti, it works over USB, but it also gives you the option to switch to XLR later if you add an audio interface, recorder, or mixer. It doesn't have the same visual presence, but it sounds better and gives you room to grow. For most podcasters, that matters more.
The Shure MV7+ offers the Q2U's USB/XLR flexibility, though at about 3x the price. With that said, it's a premium-quality microphone. If you're looking for something pretty high-end, then it's a cracking option.
Other Great Podcast Mic Options
Mics like the Shure SM7B and Heil PR40 have become visual shorthand for “serious podcast.” They're instantly recognisable on camera and, more importantly, deliver a consistent, professional sound when used properly. That combination is why they show up so often in high-profile setups. Last time I checked, Joe Rogan was using the SM7B in his studio.
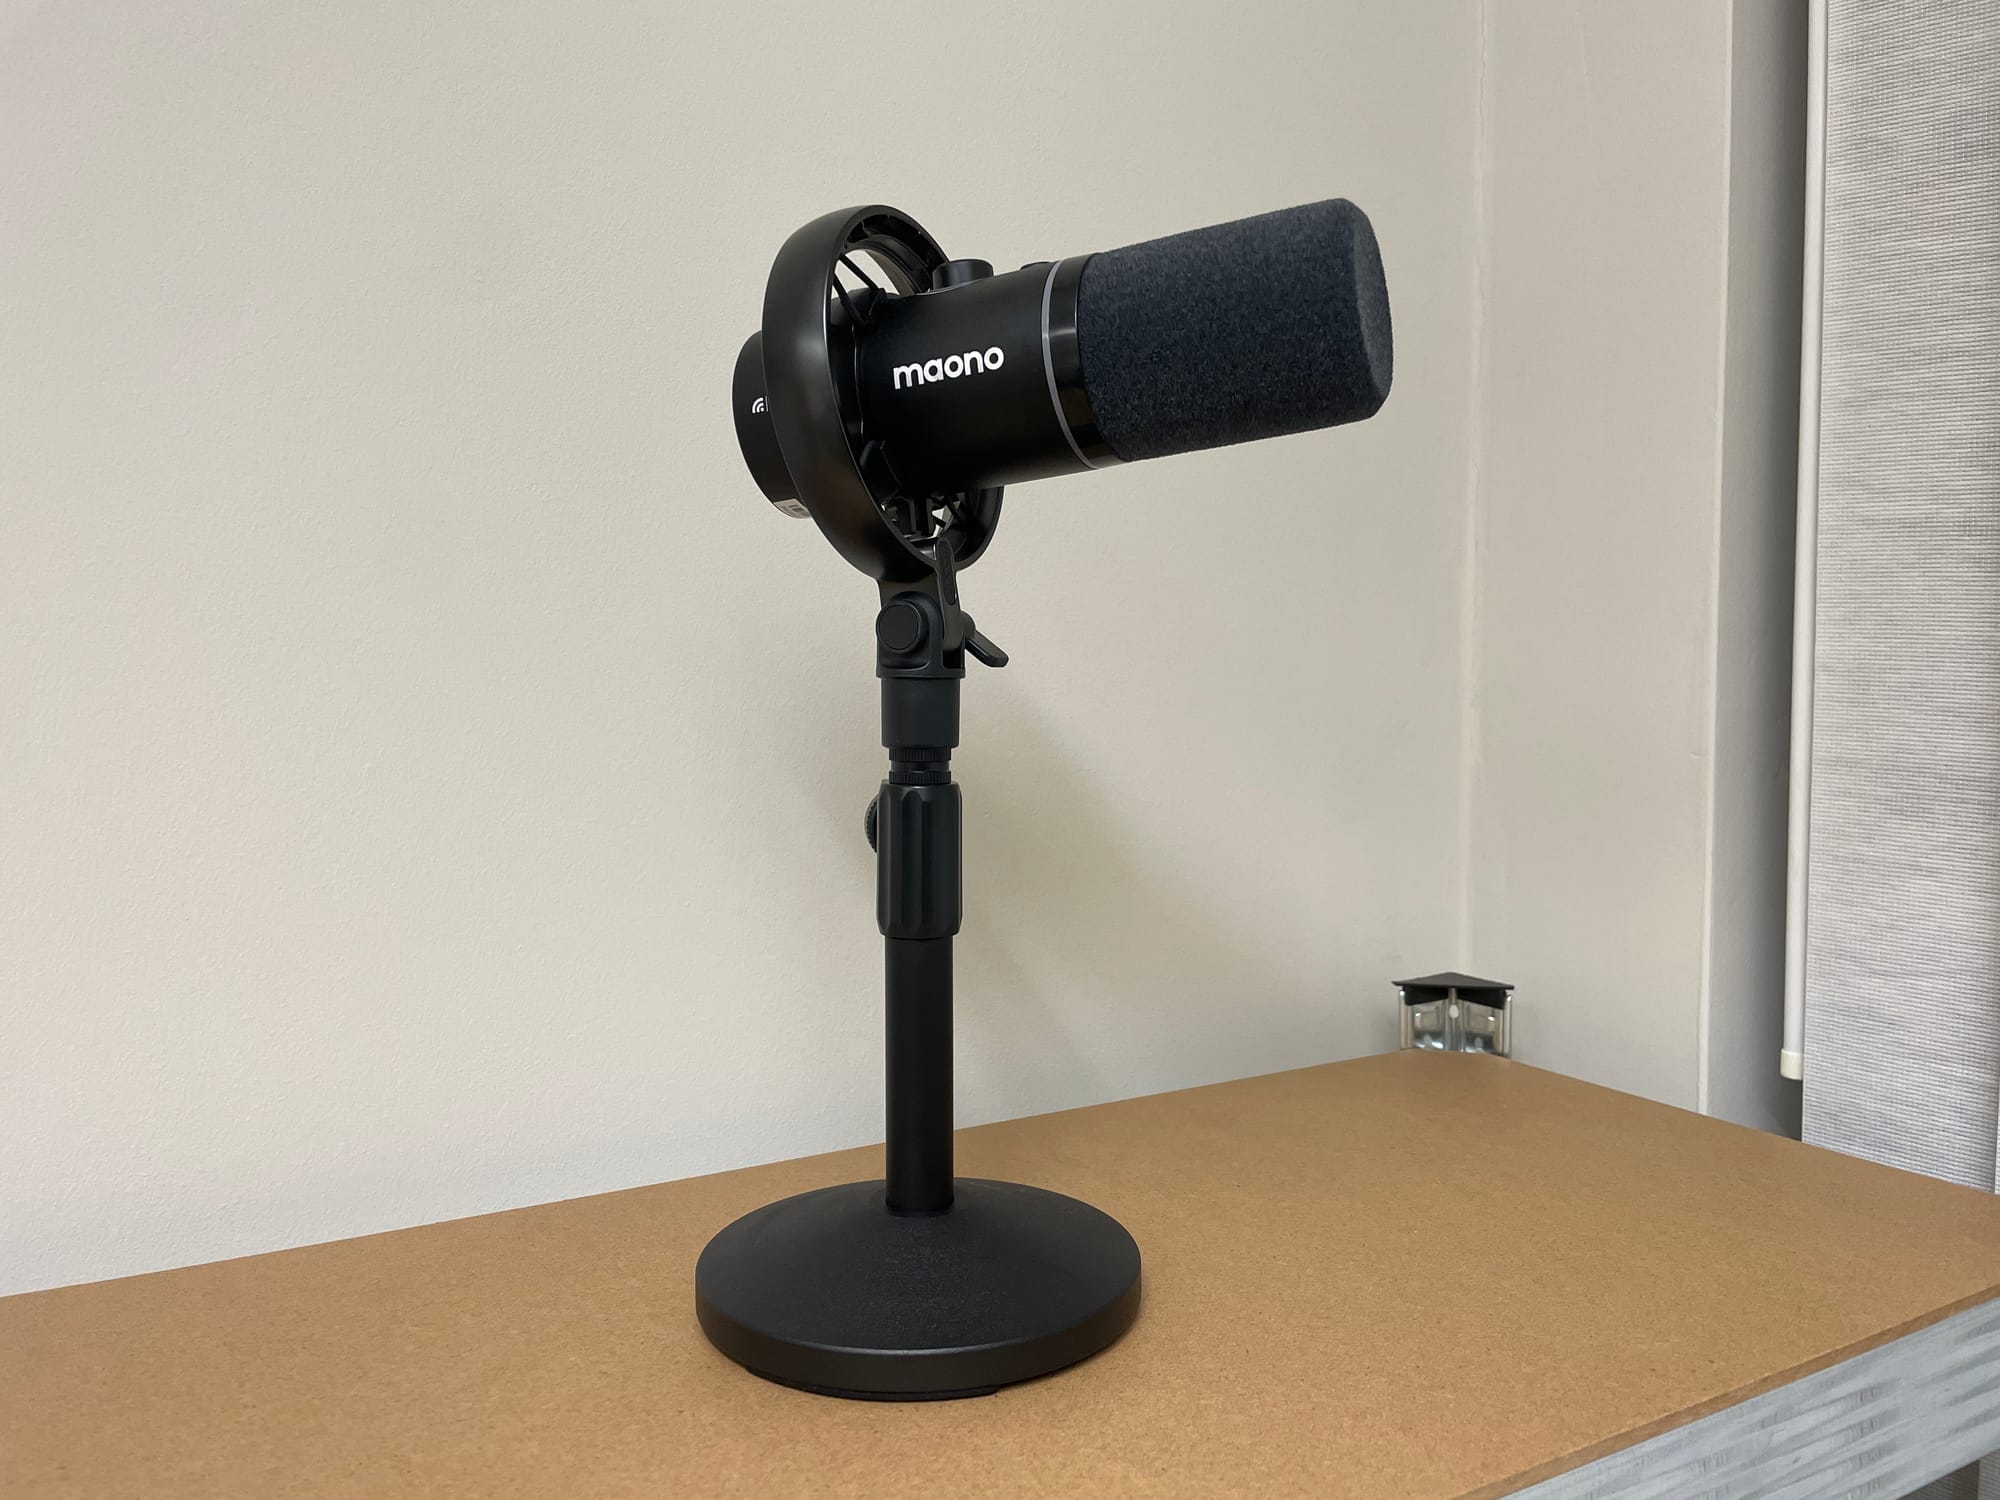
If you want something more flexible and affordable, the Maono PD200W is an interesting alternative. It can operate over USB, XLR, or wirelessly, which is unusual in a single mic. I've not seen another model cover all three. When I tested it, the audio quality held up well, and the price makes it accessible for creators who want versatility without a premium spend.
Will I Need a Boom Arm?
A boom arm is a better choice than a desk stand for most podcasters. Desk stands pick up vibrations from typing, mouse movement, and accidental knocks. A solid boom arm isolates the microphone from a lot of that.
It also gives you far more control over mic position. You can keep a consistent technique without the microphone blocking your face on camera.

Avoid cheap (sub-$20) boom arms at all costs. They're usually creaky junk, and I've seen them literally fall apart in front of me before. Opt for something like the Rode PSA1+ or IXTech Lizard. We've been using those in our studio for years.
Of course, there is a way to record brilliant video podcast sound without a boom arm in sight. For that, you might consider a wireless lavalier mic...
Wireless Lavalier Mics
Lavalier or lapel mics have a long history in front of the screen. Naturally, they've become popular amongst video podcasters and YouTubers.
Wireless lav mics eliminate much of the worry about technique, making them ideal for guests or co-hosts who are inexperienced in front of a microphone. They're also brilliant for more animated or dynamic presentation styles, as well as ultra-portable. I carry mines around with me wherever I go.
I love the Rode Wireless Micro kit. It has two transmitters (mics) and a receiver which plugs into your smartphone or computer. The Wireless Micro typically costs less than $100, but the BOYA Mini is an excellent budget alternative.
Colin uses the DJI Mic Mini and loves the quality. He's got the kit with the pair of receivers and one transmitter, which works a treat, but it also works solo alongside the DJI Osmo Mobile if you're recording video segments out and about.
Choosing an Audio Interface or Recorder
If you're using a USB mic or recording straight into a phone, you can skip this section. An audio interface, mixer, or digital recorder lets you use XLR microphones, giving you more control over your sound and generally better audio quality.
I'm a big fan of the Focusrite Vocaster. I've been using it for a few years now. Its elegant, simple design makes it beginner-friendly, but its power under the hood caters to experienced audio producers at the same time. You can pick up a one-mic Vocaster for as little as $40 or spend $70 to record two people.
There are some really high-end podcast recorders on the market today. The Rodecaster Pro 2 is an all-in-one podcast studio.
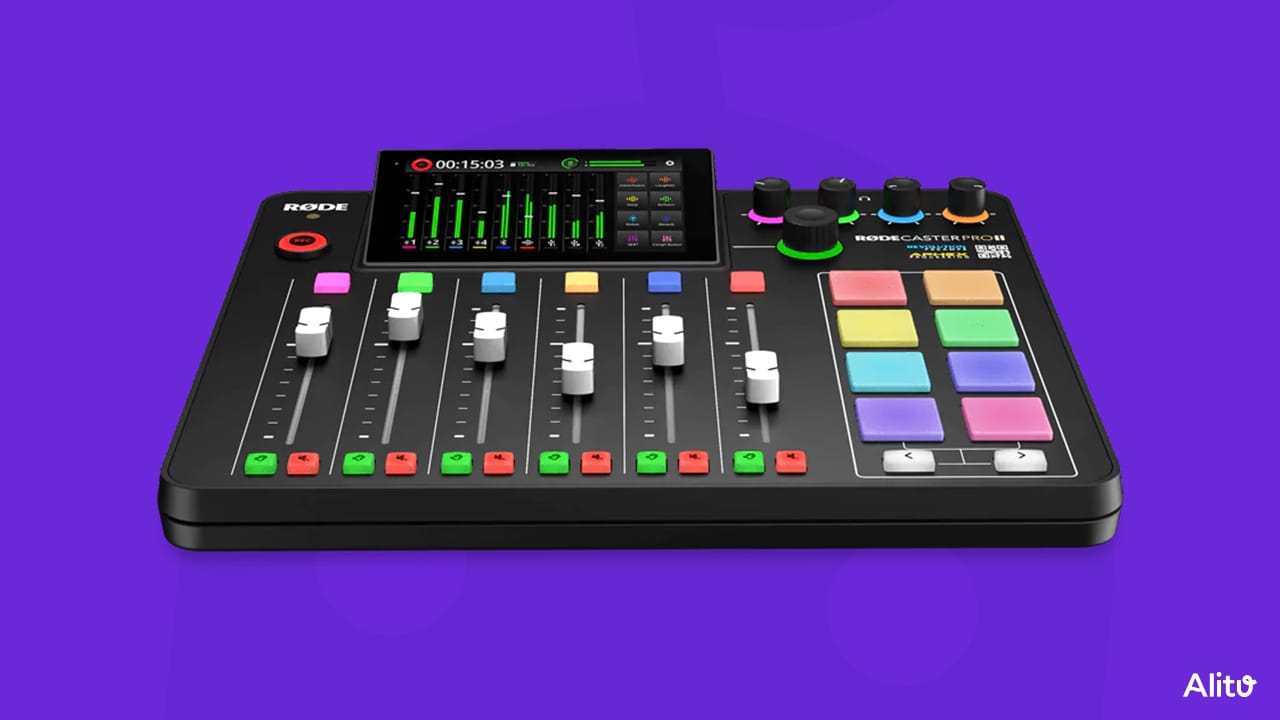
The Rodecaster is complete overkill (and over-budget) for most podcasters, but unarguably appealing to gear heads. They look fantastic in a well-lit video setup, too. The Rodecaster Duo is a smaller unit, but very similarly featured, if you only need two external mics and want to save the desk space.
We've had a Rodecaster as the central hub of our studio for years and love the range. Rode has also recently released a dedicated model for folks podcasting on camera: the aptly named Rodecaster Video. This production console lets you control six 1080p60 video sources, and mix up to 20 audio inputs!
Setting Up Your Recording Space
Simply buying a decent mic won't guarantee your audio quality. The space you use that mic in will always have the final say.
Photos of studios covered in wall-to-wall foam tiles are plentiful online, but they're not your typical podcast setup. Sound treating an entire room can be aesthetically pleasing, but it isn't necessary. Strategically placed localised treatment, combined with getting up close with your mic, is enough to kill most reverb from your recordings.
For years, I've recommended a $15 cat bed or cat house as a mini "studio" to place your mic inside. For audio-only creators, this is a game-changer. For video podcasters, though, it's going to take a bit of explaining in the comments section.
For subtle sound treatment, start with a room that already absorbs sound. Soft furnishings help, while bare walls and hard surfaces don't. You can add baffling behind the microphone and just out of frame to reduce reflections, and hang curtains or sound blankets on nearby walls for further control.
Aim for treatment that blends into the space rather than drawing attention on camera.
Video Podcast Lighting
It's best to think about lighting in two stages: lighting yourself first, then lighting the background.
Colin has just finished setting up his new podcast studio, including dialling in all his lighting, so let's hand over to him for this section...
Lighting You (Foreground)
My main lighting comes from a pair of flat LED panel lights from Neewer. We’ve used Neewer gear for years, some of it new, some of it ancient, and it’s consistently solid value.
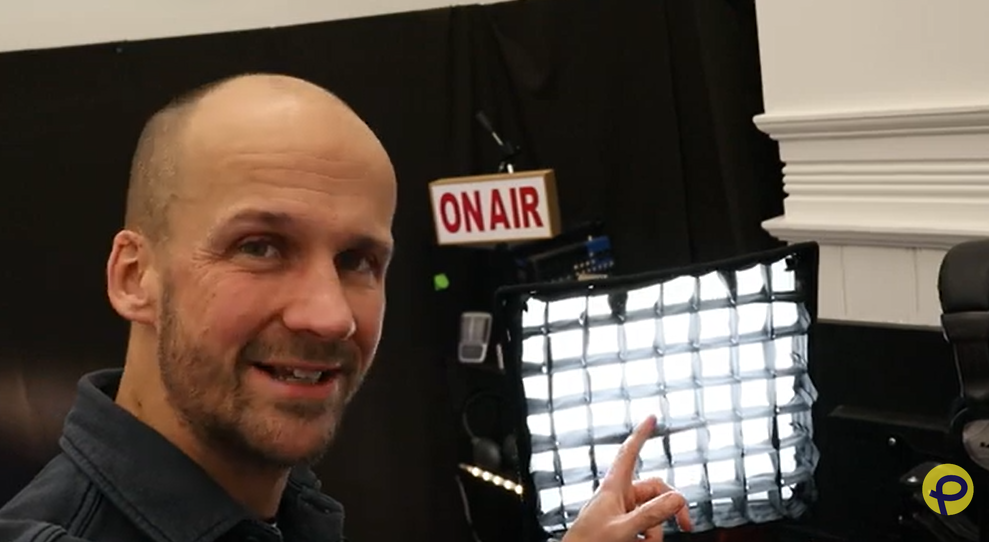
Panel lights on their own can look harsh, so modifiers matter. I run:
The softbox does most of the work, giving me a soft, even key light on one side of my face. The grid light sits on the opposite side, adding a bit of shadow and contrast. That contrast is what stops everything looking flat and lifeless.
Softbox attachments are one of the cheapest upgrades you can make to your lighting. With just those two lights, my face, mic, and foreground are properly lit without the setup feeling clinical or overproduced.
Lighting Your Background
Once I’m lit, the background is where I add interest.
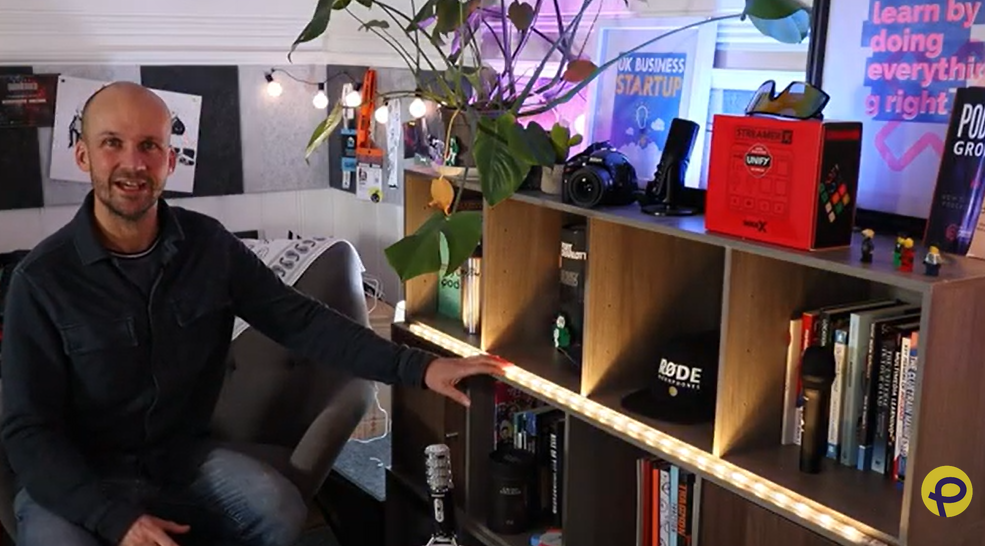
Most of that comes from Philips Hue lights. They’re not the cheapest option, but the colour control is excellent, which is what I care about.
I use:
A Hue Go, which I can tuck into a shelf or move around easily
That’s where the purples, pinks, and subtle colour washes come from. I’m not trying to turn the room into a nightclub. The goal is separation and depth, not distraction.
Alongside those, I also use:
- One completely normal lamp behind me
- A couple of long IKEA LED strips to light shelves
Those IKEA lights are simple, cheap, and surprisingly effective. They lift the background without drawing attention to themselves.
All in, the setup lands somewhere around $250-$300. You could do it cheaper, but this is a setup I use constantly and trust.
One final practical tip: make your lights easy to control. All of mine are hooked up via a Hue Bridge and an Amazon Alexa so I can switch them on quickly by voice command. If lighting feels like a hassle, you’ll stop using it properly.
The takeaway is simple:
Light yourself first. Then add a bit of depth and colour behind you. That alone will level up your video far more than almost any camera upgrade.
Designing Your Backdrop
Your background matters more than most people realise, just not in the way beginners usually think. It should subtly support you and your video, not become the main character.

Start by removing visual noise. Anything directly behind your head pulls attention away from your face, so give yourself space from the wall if you can. Shelves work well because they add depth, and depth is what separates a Zoom call from a video people actually want to watch. A small number of familiar objects will always beat clutter or decor bought just for the shot.
If your background supports the story instead of competing with it, your video immediately feels calmer, clearer, and more confident.
What to Wear in a Video Podcast
Clothing for video podcasting is about consistency and contrast, not style.
Solid colours almost always beat patterns, which can shimmer or pull focus on camera. Mid-tone colours are the safest choice. Bright whites can blow out under lights, and pure black often loses detail.
The aim is simple. Your clothing should separate you from the background without competing with your face.
Once you find something that works, stop experimenting. A repeatable on-camera uniform removes decision fatigue and gives your show a recognisable, professional look over time.
The Best Software for Recording and Editing Video Podcasts
Once your setup is ready, the next decision is which software to use for recording and editing your video podcast.
There are dozens of tools available, but most creators only need a single platform that handles both recording and editing in one place. Below are three options that fit that brief.
Alitu
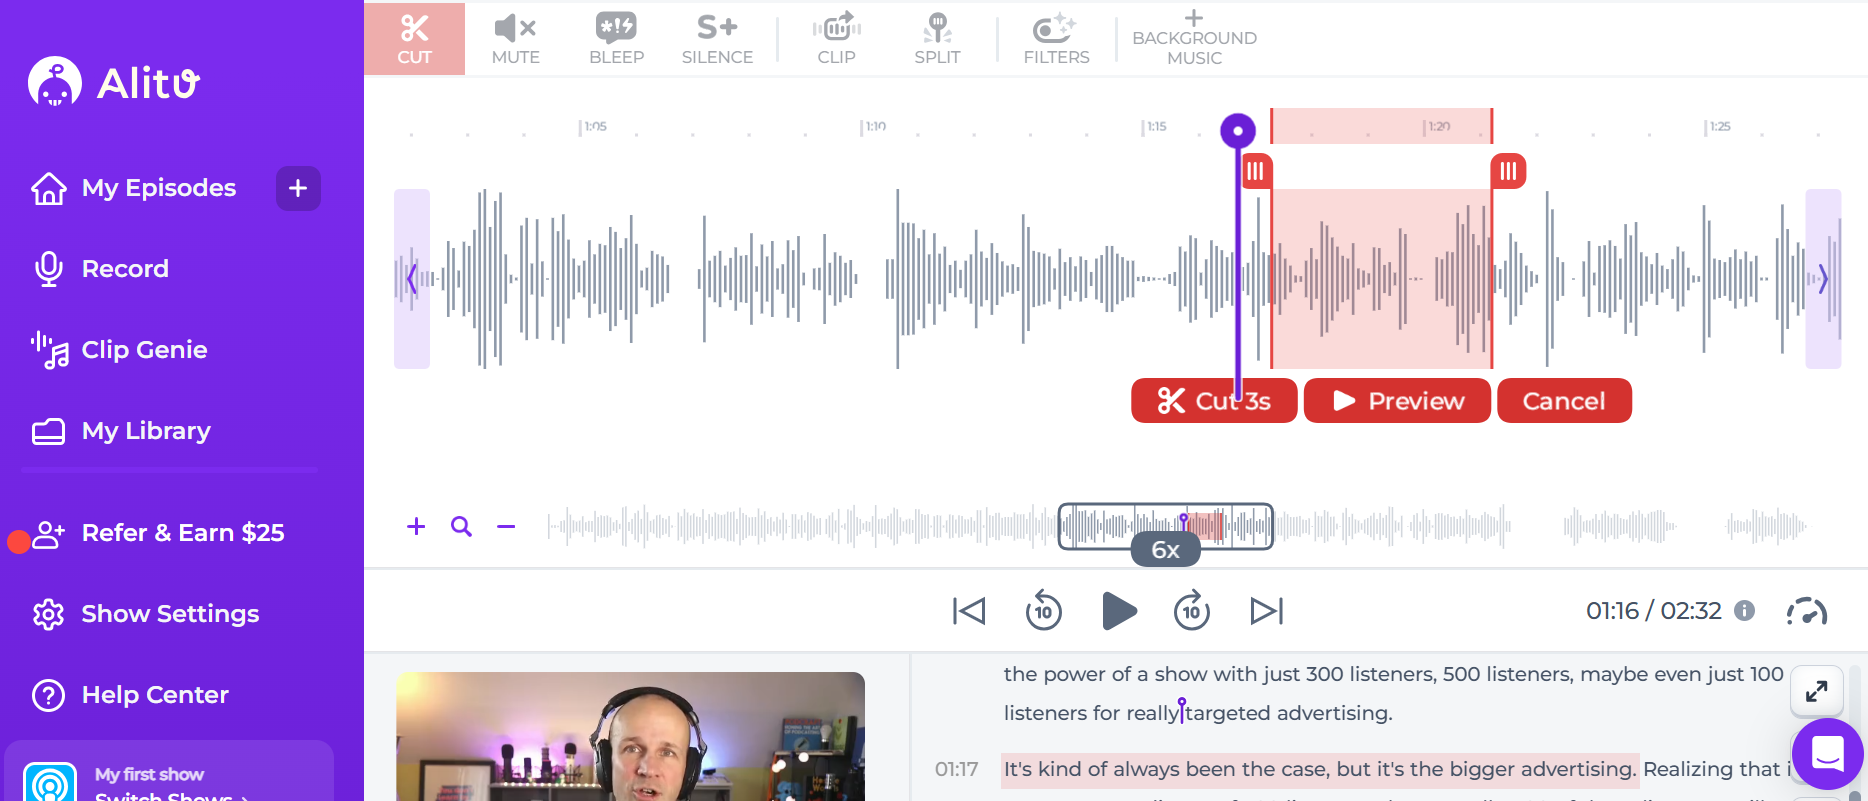
You can record your video directly in Alitu, full local quality, then handle editing in the same place. Alitu automatically balances volume levels, cleans up background noise, and applies EQ, which matters because clear audio is still the foundation of any video podcast. You can remove filler words and long silences with one click, split clips, cut unwanted sections, and even edit your video by deleting text from its automatically generated transcript. Alitu costs $38 per month or $380 a year (two free months), and there's a free trial so you can test it all out for yourself!
Riverside
Riverside is a popular option for recording video podcasts with remote guests. Like Alitu, it records audio and video locally on each participant’s device, so connection issues don’t affect the final files. You get separate tracks, up to 4K video, layout controls, and transcript-based editing tools. It’s a strong fit if recording quality is your top priority and you regularly work with remote guests. Prices start at $29 per month, with discounts available on annual plans.
Zencastr
Zencastr is another browser-based platform that combines remote recording and editing in one place. It records each participant locally to produce clean, separate tracks, then lets you make edits using an automatically generated transcript. Zencastr also offers a genuinely useful free tier if you plan to edit elsewhere. Paid plans, starting at $30 per month, add optional automated post-production and unlock a 1080p video RSS feed. That feed lets you distribute your video podcast to platforms that support video via RSS, without extra hosting or manual uploads.
Other Video Podcast Software Options
Exhaustive lists are unhelpful, but there are some other tools and platforms we've used that are worth mentioning.
SquadCast handles high-quality remote recording using local audio and video files, while Descript is used for editing those recordings. Together, they offer a workflow focused on speed and text-based editing, making them a good option if you value fast turnaround and transcript-driven edits over traditional timelines.
Zoom can be used to record video podcasts and is familiar to almost every guest. However, it does not use local recordings, and both audio and video are heavily compressed. It’s convenient, but quality and flexibility are limited compared to creator-focused tools.
FlexClip, Veed, and Filmora are beginner-friendly editors rather than recording platforms. They work well for quick edits, social clips, and simple video assembly, but they struggle with long-form episodes, complex timelines, or multi-camera workflows.
StreamYard is best known for live streaming, but it also supports recording shows either locally or in the cloud. It’s popular for interview formats and live-to-tape workflows, especially if you want branding, overlays, and multi-platform publishing built in.
Adobe Premiere Pro is a professional video editor, not a recording tool. Many podcasts finish their episodes here because it offers full control over audio, video, colour, and pacing. The learning curve is steep, but the flexibility is unmatched if you’re willing to invest the time.
Hiring a Video Podcast Producer
Even though a tool like Alitu can make editing your video podcast ridiculously simple, there are many reasons why you might prefer to hire help. Our pals at Lower Street work with brands to help them build and grow their shows. If you want to work with someone and outsource the heavy lifting, then give them a shout and tell them we sent you!
Where to Upload and Distribute Your Video Podcast
Alright, time to get that video podcast out there to the world. But where do you actually upload the thing?
YouTube
If you have a Gmail account, you can easily start a YouTube channel and upload videos. In fact, uploading to YouTube is so easy that it happens an estimated 20 million times per day.
But don't just upload your video and call it done. There's a special setting to let YouTube know this is a podcast series. Go to the YouTube Studio section and click the ‘create’ button in the top right corner. Then, select ‘New Podcast’. You’ll see three options:
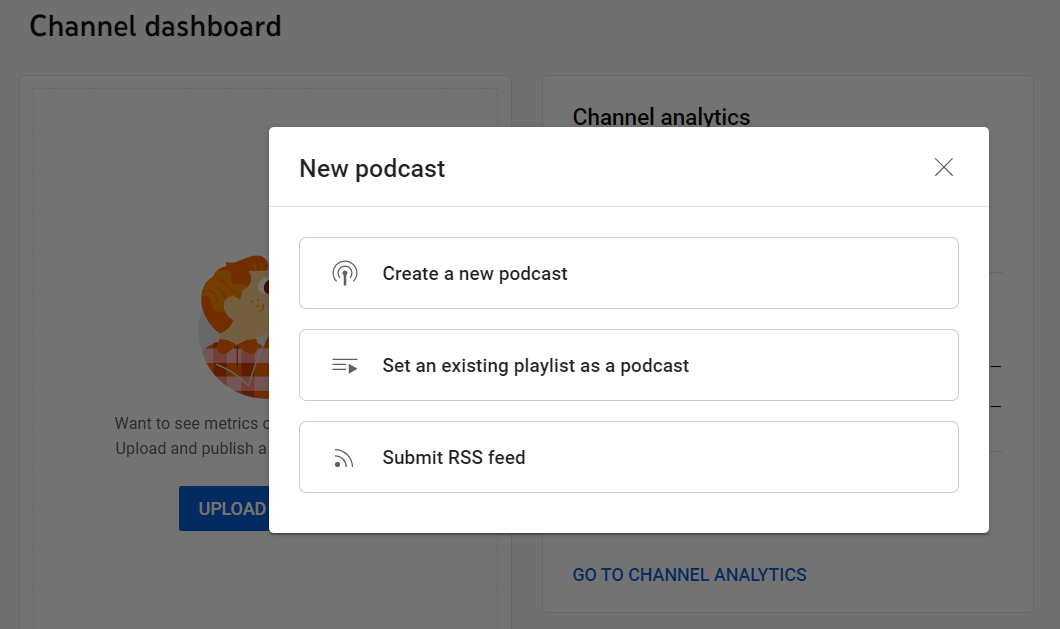
Here, you can create a new podcast series in your channel or mark an existing playlist as a podcast.
YouTube also lets you submit an RSS feed so new episodes from your podcast host appear automatically on your channel. Episodes added this way are always published as static image videos, meaning audio paired with cover art.
YouTube does not currently ingest full video episodes via RSS feeds. Even if your hosting provider supports video RSS, YouTube will still generate a static image video. To publish true video podcast episodes on YouTube, you need to upload the video files directly.
Spotify
30% of podcast consumption happens on Spotify, and the app supports and encourages video podcasting.
There are two angles to approach video on Spotify from.
- Using the platform as your hosting provider
- Or, hosting elsewhere but making your show available on Spotify.
I recommend the latter, but let's start with shows that are hosted on Spotify.
In this situation, you'd only upload your video episodes directly to Spotify. These videos will be available on Spotify, but they'll be converted to audio when played elsewhere (Apple Podcasts, Overcast, etc).
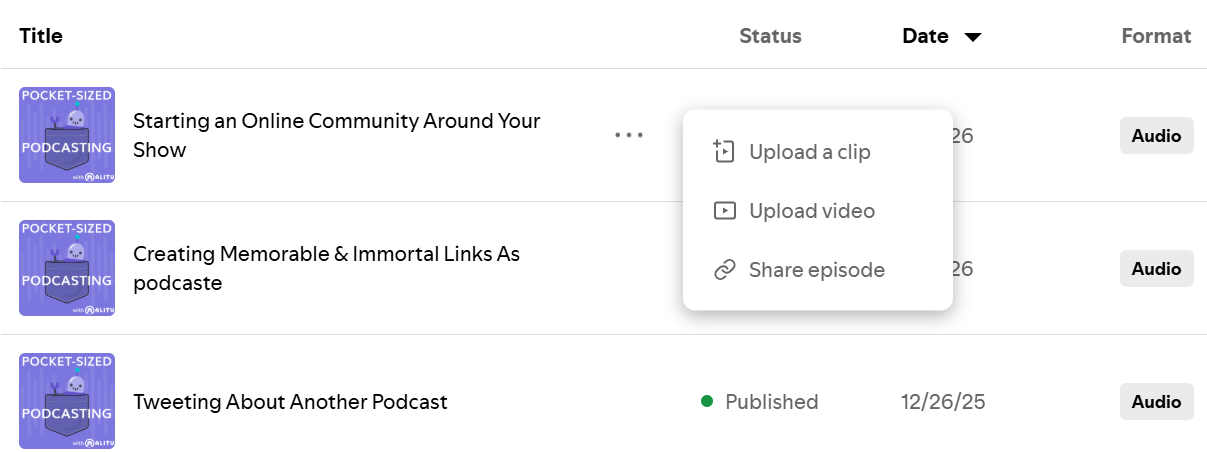
If you host your show elsewhere, submit it to be listed on Spotify, then inside Spotify for Creators, go to your episode list. Click the three dots beside any episode, and you can upload a full video episode to replace the audio one.
That video will only play on Spotify, and it won't affect how the episode appears in other apps. However, uploading a video changes the audio source Spotify serves to its listeners. Even if someone listens in audio-only, Spotify will now play the audio from your video file instead of the version from your hosting provider. This will disable dynamic ad insertion on that episode, so be aware of that if you work with advertisers or sponsors.
Uploading a vertical, "TikTok-style" clip on Spotify doesn't replace your episode. Clips are separate Spotify-native promotional assets.
They can appear on your show page, attach to specific episodes, and surface in Spotify’s home and discovery feeds. Importantly, clips don't change your episode audio, affect distribution to other apps, or interfere with dynamic ad insertion.
Think of clips as a way to drive attention and discovery inside Spotify, not as an alternative episode format.
YouTube and Spotify are handled separately. If you publish a video podcast, you must upload your video episodes to each platform individually, regardless of where you host your audio.
Hosting Providers That Support Video RSS
There's more to video podcasting than the walled gardens of YouTube and Spotify.
Apple Podcasts still accounts for around 35% of podcast consumption and supports video podcasts delivered via RSS. The key advantage is that Apple Podcasts pulls video episodes directly from your hosting provider, removing the need for manual uploads.
A smaller number of other apps, including Podcast Addict, can also display video episodes via RSS, though support varies by platform.
To distribute video podcasts via RSS, you need a hosting provider that explicitly supports video delivery. Established hosts like Podbean and Blubrry offer the tools to do this reliably.
I also mentioned Zencastr as a great video recording option. On its $30 a month tier, you can host your podcast there and publish videos via your RSS feed!
Making a Video Podcast in 2026
Video podcasting is a choice, not a necessity. But if you've decided it's a good fit and a worthy investment, then you're now armed with the tools and tactics to make it work for you.

At Alitu, we’ve extended the same recording and editing approach we built for audio into video podcasting.
Video podcasters get text-based editing, automatic audio cleanup, volume levelling, and filler word removal in one place.
The goal is simple: help your videos sound intentional and considered, not like another unedited Zoom call. Try it free for seven days and see for yourself!
